× Introducing the Orbi 970 Series Mesh System with WiFi 7 technology. For more information visit the NETGEAR Press Room.
Orbi WiFi 7 RBE973
Reply

Re: Initial Installation: EX6100 as an Access Point or WiFi Range Extender !

markstone1121
Aspirant

Initial Installation: EX6100 as an Access Point or WiFi Range Extender !

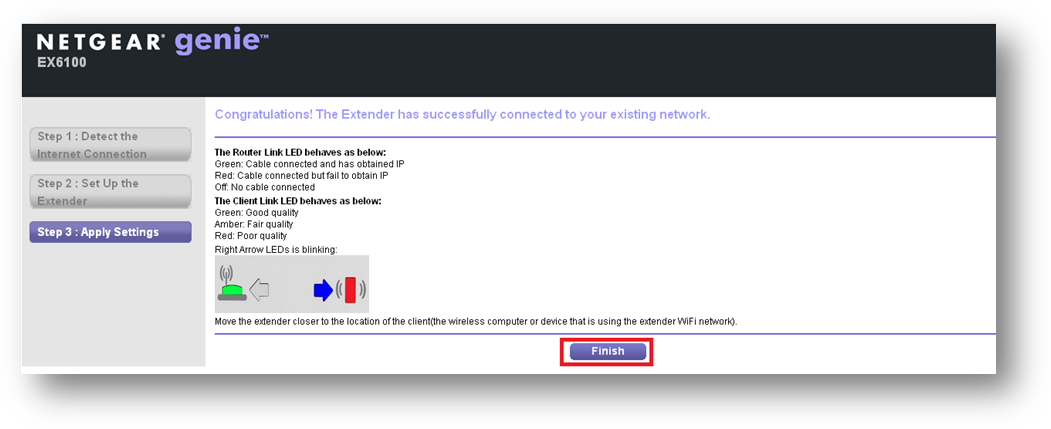
This article ia a step-by-step procedure on how to install the EX6100 as an:

  • Extender (extending Wi-Fi coverage to a larger area)
  • Access Point (boost the Wi-Fi signal or add 11ac Wi-Fi access to an 11b/g/n router/gateway)


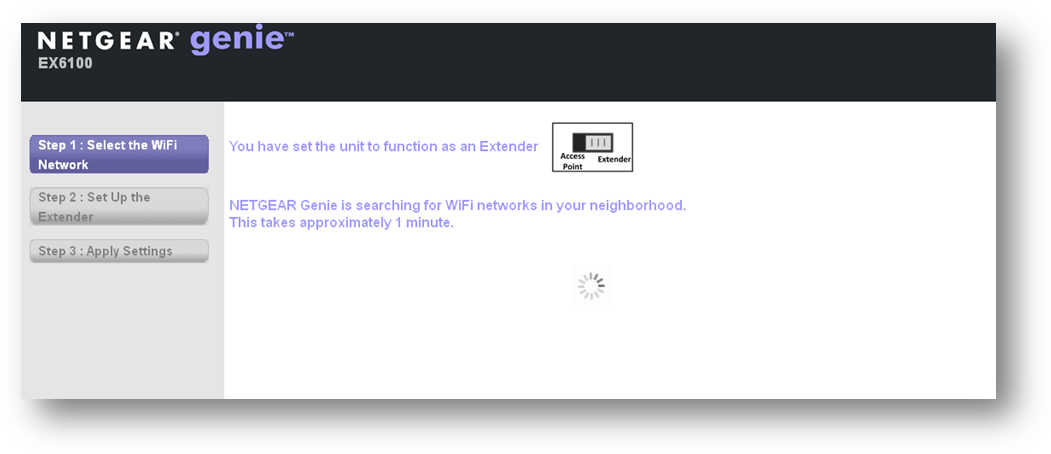
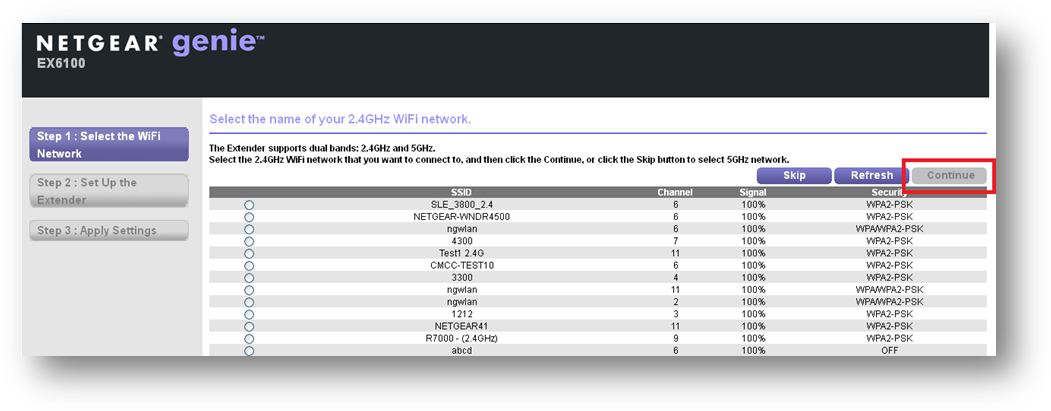
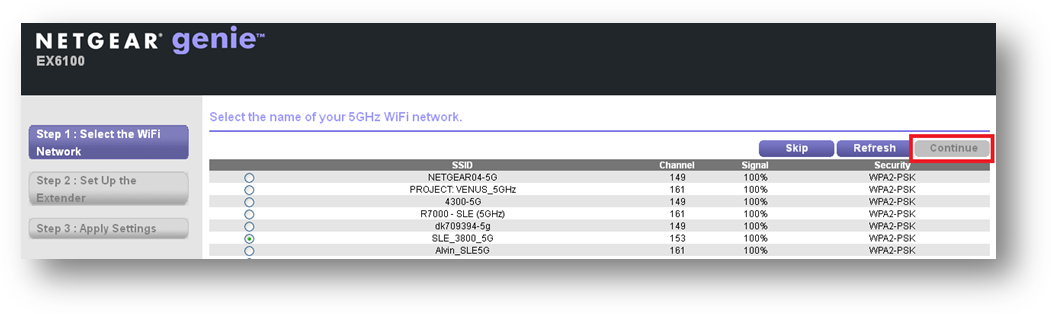
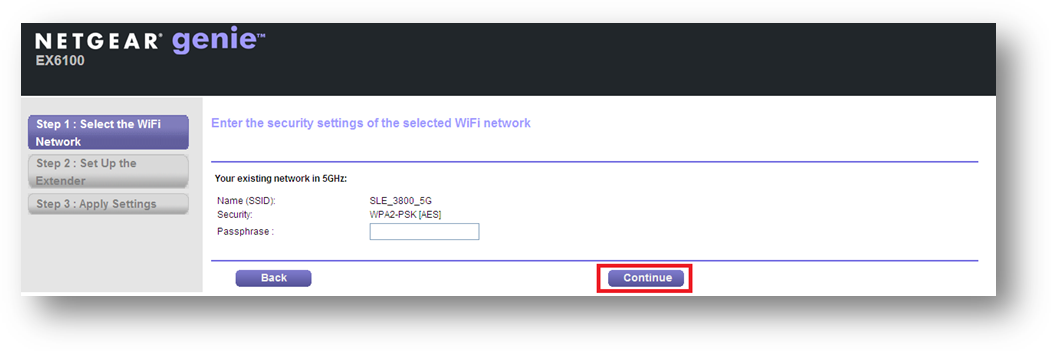
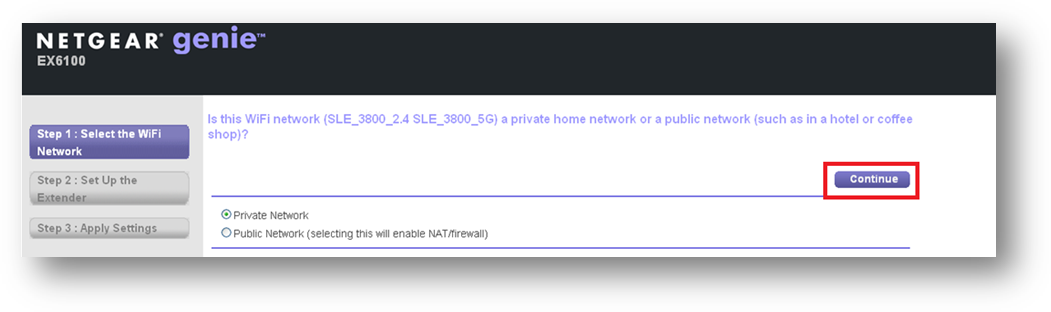
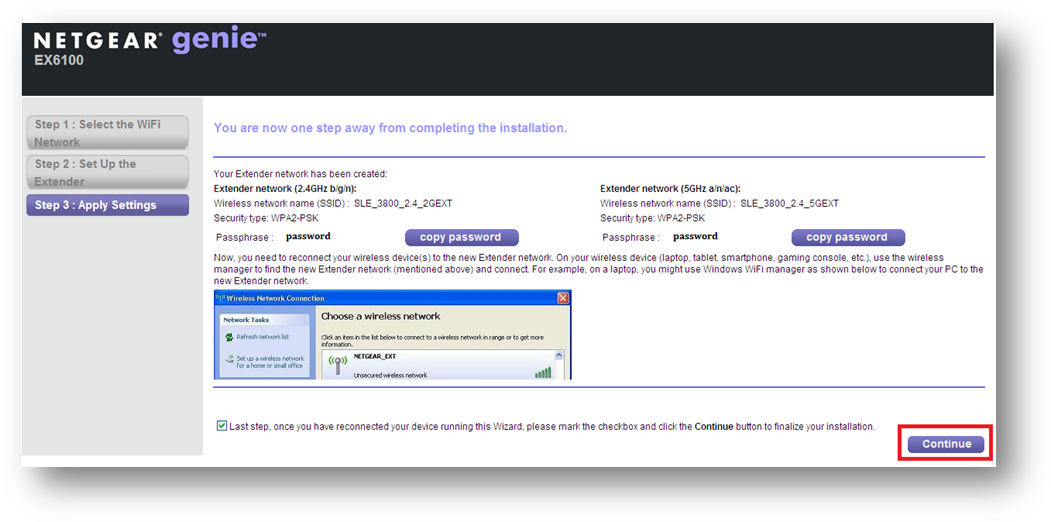
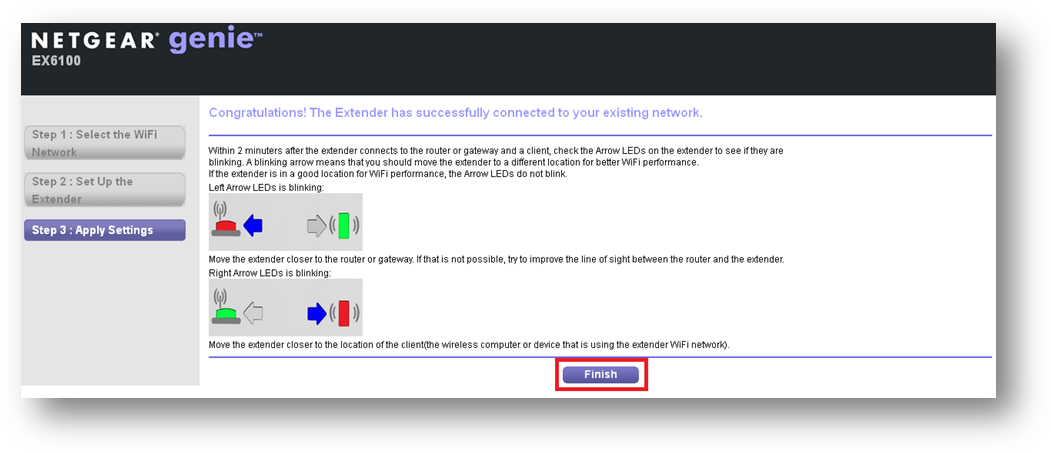
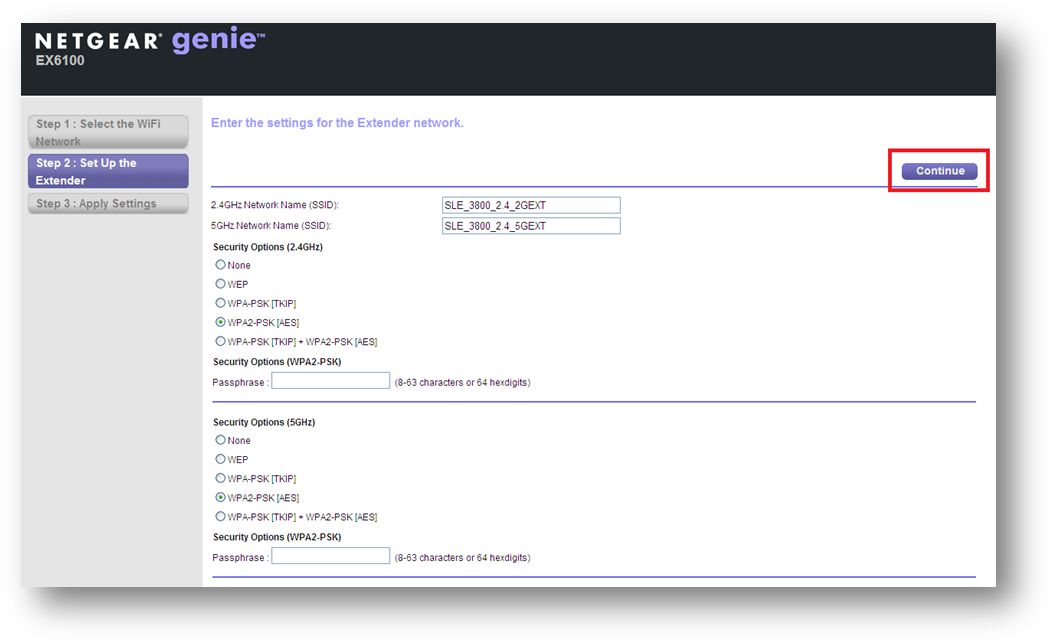
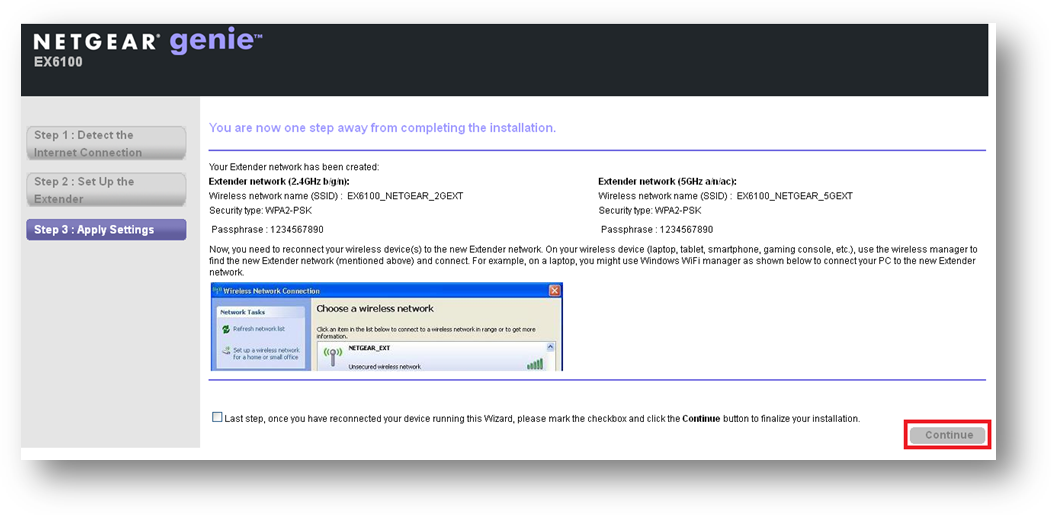
Extender installation:

  1. Set the switch on the EX6100 to Extender.

  2. Plug the EX6100 into an electrical outlet halfway between your wireless router and computer.
  3. Wait for the Power light to become solid green.

    Note: If the device did not turn on, push the On/Off switch on the side of the EX6100 beside the switch.

  4. On your wireless computer, tablet, or smartphone, view the available wireless networks and connect to the EX6100 signal. It has two Wi-Fi networks:
  5. Once connected to the network, the Extender Client Link light will turn on.
  6. Open an internet browser and go to www.mywifiext.net.

  7. Select the SSID for 2.4GHz and click Continue.

    Note: If you click on Skip, make sure your wireless router supports 5GHz band.

  8. Type the network Passphrase and click Continue.

  9. Select the SSID for 5GHz and click Continue.

  10. Type the network key and click Continue.

    Note: You can click Skip if you do not want to connect the device to 5GHz or if you have no existing 5GHz network.

  11. Select Public Network or Private Network and click Continue.

    • Public: Hotel Wi-Fi, Coffee shop Wi-Fi, Airport Wi-Fi etc
    • Private: Own home/office network
  12. Enter the security settings for the Extender and click Continue.

  13. Genie will now apply the settings.
  14. Connect to the extender wireless network and click Continue.

  15. Click Finish.


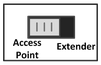
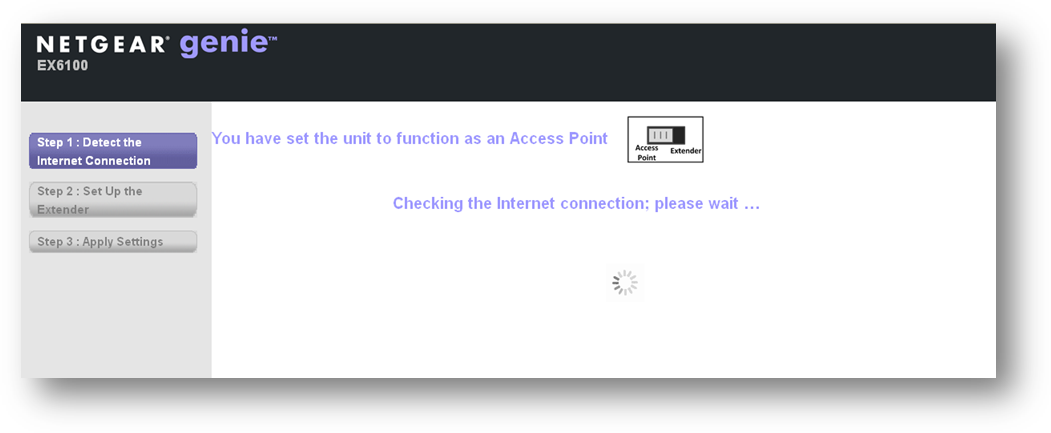
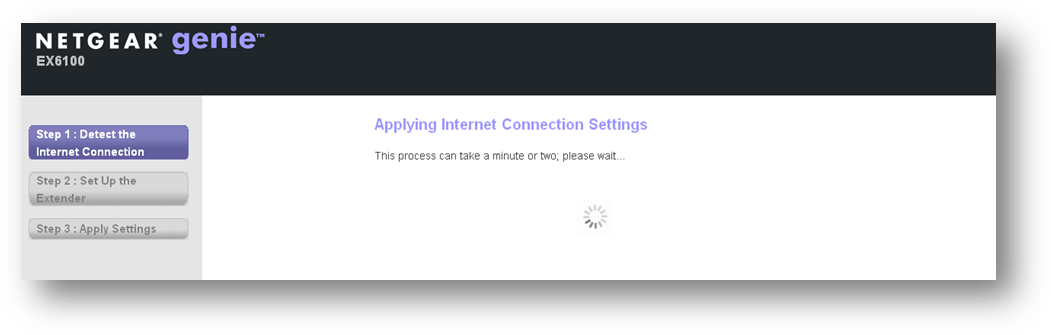
Access Point installation:

  1. Set the switch on the EX6100 to Access Point.

  2. Connect an Ethernet cable from the router/gateway to the EX6100 Ethernet port.
  3. Plug the EX6100 into your electrical outlet near your router/gateway.
  4. Wait for the Power light to become solid green.

    Note: If the device did not turn on, push the On/Off switch on the side of the EX6100 beside the switch.

  5. On your wireless computer, tablet, or smartphone, view the available wireless networks and connect to the EX6100 signal. It has 2 Wi-Fi networks:
  6. Once connected to the network, the Extender Client Link light will turn on.
  7. Open an internet browser and go to www.mywifiext.net. 

  8. The device will detect the internet connection and apply the settings.

  9. After successfully detecting the internet connection, select if the wired connection is Public or Private. Click Continue.

    • Public: Hotel Wi-Fi, Coffee shop Wi-Fi, Airport Wi-Fi etc
    • Private: Own home/office network
  10. Enter the security settings for the Extender and click Continue.

  11. Genie will now apply the settings.
  12. Connect to the extender wireless network and click Continue.

  13. Click Finish.

Model: EX6100|AC750 WiFi Range Extender
Message 1 of 2
jvasanth1984
Virtuoso

Re: Initial Installation: EX6100 as an Access Point or WiFi Range Extender !

Hi @markstone1121,

                                  Yes. Do you have any doubts or issues on this unit or this article?

Message 2 of 2
Discussion stats
  • 1 reply
  • 4291 views
  • 0 kudos
  • 2 in conversation
Announcements

Orbi WiFi 7